Friday, November 19, 2010

Southwest Stuffed Peppers ~ 11.19.10

This recipe hails from my cousin, Karen, who is a foodie like myself. In fact, she, too, has a wonderful food blog that I think you should check out: Farmhouse Foodie.

She made these stuffed peppers one summer and I was an instant fan. I make my own version of an enchilada sauce that I found via Creatively Domestic and combined it with my cousin's recipe. I really recommend you just make it yourself, it's so simple to throw together and it's definitely more economical.  I swap out a few extra ingredients and use one jar of Tastefully Simple's Corn, Black Bean Salsa. You can adjust the heat on these according to your family. I've been making it with a bit more kick each time I throw it together!

Southwest Stuffed Peppers
from my cousin, Karen DiPasquale

6 large red peppers (I just buy the red/orange/yellow asst. at Sam's club)- you can cut these the way you like, I prefer cut crosswise and cored. I have steamed them to remove some liquid but it's not a necessary step
1 pkg sweet turkey sausage: browned and crumbled- you buy the links and squeeze out the sausage from the casing- flatten it and saute until browned and cooked through
8 oz pkg corn bread stuffing
8 oz Monterey Jack cheese (or Pepper Jack for more heat)
1/2 can chicken broth (the last time I made this I added beef broth by accident- it was FINE!)
1 jar Tastefully Simple Corn, Black Bean Salsa (or any store brand you like OR 1 15 oz can diced tomatoes; 1/2 can black beans;1 cup frozen corn)

Combine all in a large bowl. Scoop into peppers. Pour a little sauce on the bottom of 9x13 pan and then add filled peppers. Pour sauce over the top of peppers and bake covered for 30 minutes at 350 degrees, Uncover and bake 30 minutes more. Can add additional sprinkling of cheese at the end.

Enchilada Sauce:
1 Tbs veg oil
1 onion, minced
1/2 tsp salt
1/2 of a chili (from chiles in adobo sauce can)
2 tsp cumin
3 garlic cloves, minced
2 tsp sugar
1 large can tomato sauce (you can add an additional small can and it will give you extra sauce to freeze or to have to reheat these)
1/2 cup water

Cook onion and garlic in veg oil. Add spices and stir and coat the onion- about 30 sec. Stir in tomato sauce and water. Simmer until warmed through and slightly thickened- about 5 minutes. Season with S &P.

These are great served with Lime Cilantro Rice and an ice cold beer!

Wednesday, November 17, 2010

Homemade Creamy Hummus ~ 11.17.10


Making your own hummus is such a good trick to have in your back pocket. You only need to have a few pantry staples on hand to throw this together in minutes!
I found this recipe in an issue of Cook's Illustrated and took their recommendation on what brand of tahini to buy as well.
Most hummus recipes that I love have tahini as the star ingredient (next to the chickpeas, that is). Tahini looks like peanut butter but is ground sesame seed paste. CI recommended Joyva or Krinos brand tahinis. I found the Krinos at Market District Giant Eagle for about 6.99 a bottle. I'll probably get at least 4 hummus recipes out of that one bottle, so it's well worth buying your own and making it in the food processor.
They also gave recommendations on which brand of chick peas/garbanzo beans to buy. Pastene came highly recommended and in second place, Goya.


Restaurant Style Hummus
This recipe would be great with homemade Pita Chips!

3 Tbs juice from 1-2 lemons
1/4 cup water
6 tbs tahini, stirred well (that equals 1/2 cup, why they don't say that, I'm not sure)
2 Tbs extra virgin olive oil, plus more for drizzling
1 (14oz) can chickpeas, drained, rinsed and picked through- I took out the "skins"
1 small garlic clove, minced (about 1/2 tsp)
1/2 tsp salt
1/4 tsp ground cumin
pinch cayenne
1 Tbs minced fresh cilantro or parsley (optional)
paprika (optional)

1. Combine lemon juice and water in a small bowl. Whisk together the tahini and 2 Tbs oil in second bowl. Set aside 2 Tbs. chickpeas for garnish.
2. Process remaning chickpeas, garlic, salt, cumin, and cayenne in food processor until amost fully ground. Scrape down bowl with spatula. With machine running, add lemon juice/water mixture through feed tube. Scrape down bowl and continue to process for 1 minute. With machine running, add tahini mixture in steady stream through feed tube; continue to process until smooth and creamy, about 15 seconds.
3. Transfer hummus to serving bowl, sprinkle with chickpeas and cilantro, cover with plastic wrap and let flavors meld, at least 30 minutes. drizzle with olive oil and serve.

- if you're holding this over for awhile, reserve garnishes until ready to serve. I was transporting my hummus the day I took the pic and didn't want EVOO all over the place, so I just garnished with a little paprika and the chickpeas.
-keeps up to 5 days in fridge. If too thick, add a Tbs of warm water and mix well before serving.

Wednesday, November 10, 2010

Creamy mushroom toasts ~ 11.10.10


A long time ago, in a galaxy far, far away.

oh good grief, can you tell I'm a mom of 4 boys?

Let me start over...

A long ways back, I happened upon this simple little recipe. It is just the perfect little treat for a late dinner or when you need a comforting happy belly sort of lunch.

It's quick to throw together and forgiving in that as long as you use the main ingredients of mushrooms, cream and toast... you're golden.

I'm eating it right now and had to pour myself a glass of wine (b/c I'm cooking something with it and well, Julia Child would do that, right?) to go along with it. It's a classy yet simple kind of meal.

Buon Appetit!

Creamy Mushroom Toasts
adapted from Angry Chicken
Like I said up above, this is forgiving, so if you don't have shallots, don't fret, I've made it without them. And if you don't have fresh herbs, use a little dried. Just stick to the main stuff: mushrooms, butter, cream, good crusty bread. You'll thank me.

8oz button mushrooms, sliced
1 Tbsp or so of butter
fresh herbs chopped: I like thyme and parsley
half a shallot, minced fine
S & P
heavy cream- couple Tbsp's
crusty bread
optional: Adobo seasoning (I just have to put it on everything!)

Heat a saute pan and get your butter in there and melted. (if you're using shallots, add them at this point and saute until translucent- I didn't have them today) Add the sliced mushrooms and don't crowd the pan or mess with them too much. You want them to get good and toasty on one side before you push them around. After about 5 minutes or so, stir the mushrooms around and season with S & P and some Adobo seasoning, if you'd like. S&P is just fine, too. Now, add some chopped herbs and a couple Tbs of cream. I do not measure this, just eyeball it a bit and add some till my mushrooms are swimming in a pool of cream and happy as can be. Happy mushrooms = Happy Crafty. Cream = Very happy Crafty!

Taste and adjust seasoning.
Slice your bread and toast to perfection.
Serve your creamy mushrooms alongside the toast and pour yourself a glass of wine. Enjoy!

Friday, November 5, 2010

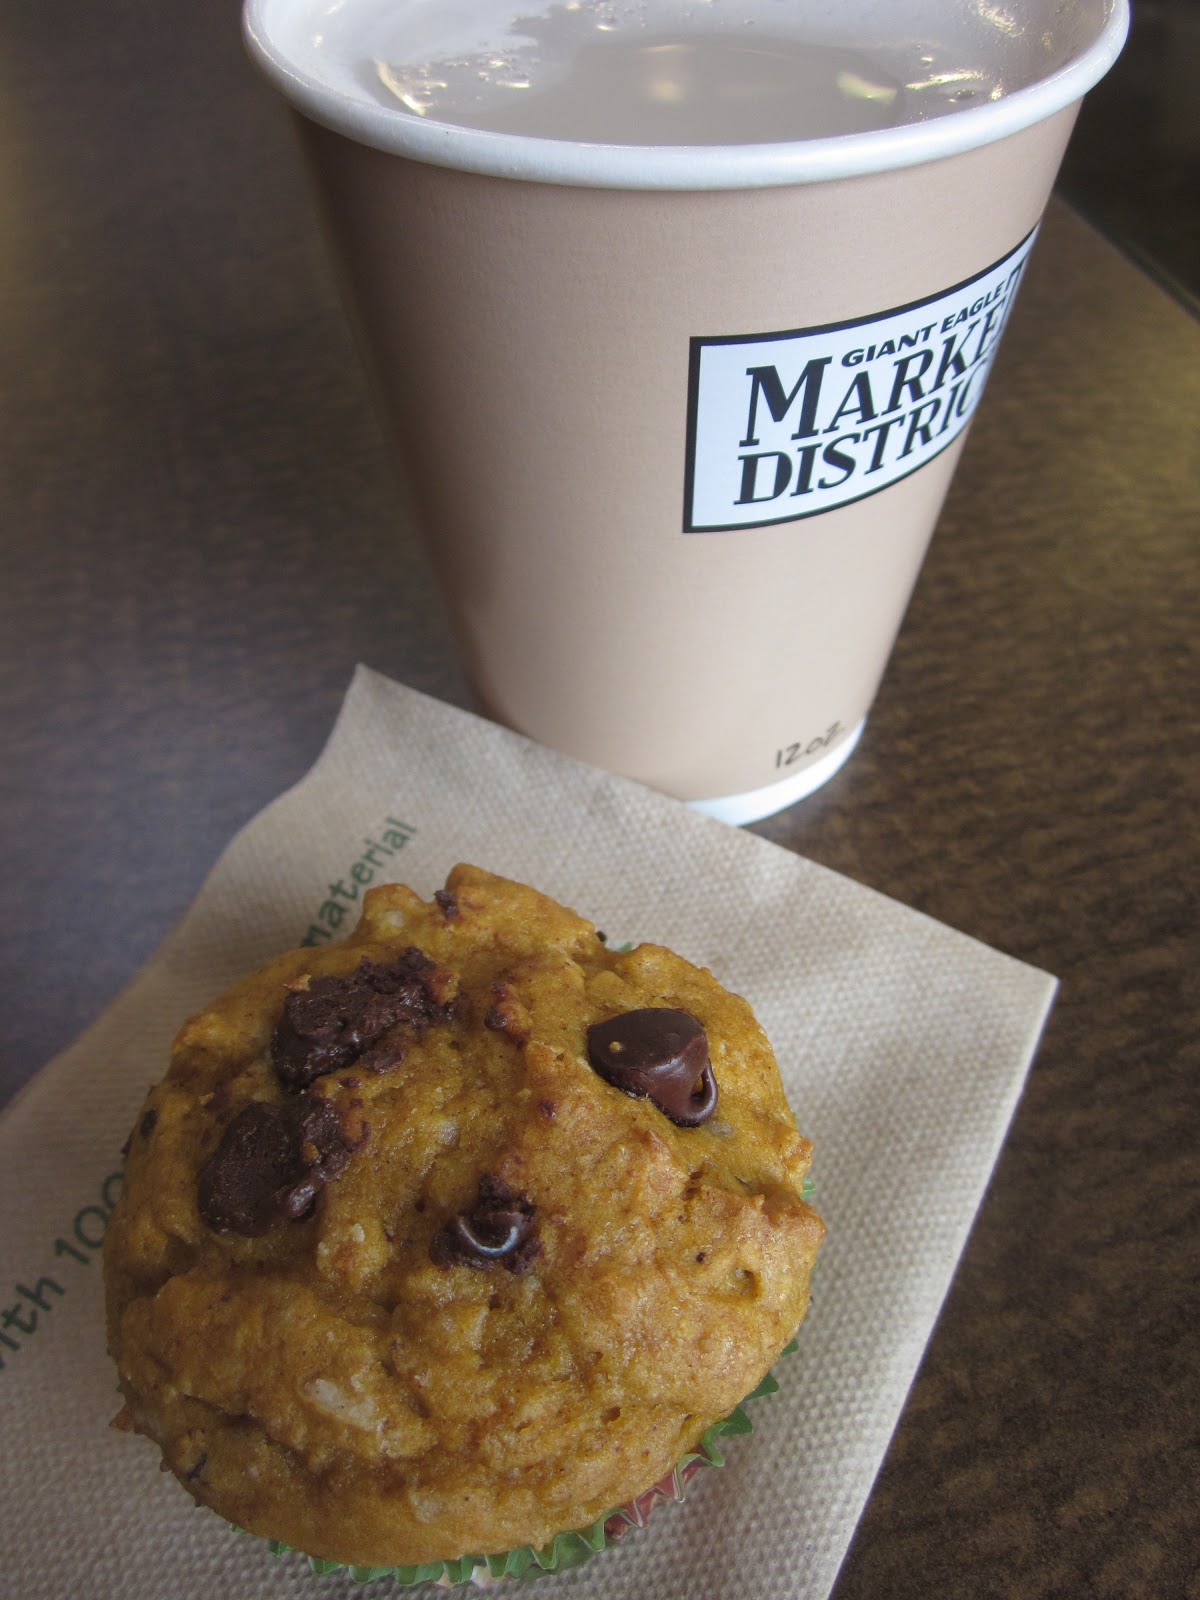
Pumpkin Chocolate Chip Muffins ~ 11.5.10


I know I have mentioned before my love for the book, Cupcakes from the Doctor, but in case you missed out on that... hear me now... I LOVE THIS COOKBOOK. Go treat yourself and pick it up, will you? Because several of my favorite recipes are tucked inside it. I go to it all the time and I went to it yesterday to make a simple  ridiculously simple pumpkin chocolate chip muffin recipe.


The secret ingredient is Chocolate Chip Muffin Mix. I happened upon a box of Martha White 17.9 (or so) oz.  They were incredible! I have used other mixes before, but I'll be on the lookout for the blue box of Martha White Muffin mixes in the future!

This is so quick you'll have hot and delicious muffins ready to warm the bellies of all those you love in no time flat!


Pumpkin Muffins with chocolate chips

1 pkg chocolate chip muffin mix
1 cup canned PUMPKIN
1/2 cup milk
1 large egg
1/2 tsp pumpkin pie spice (if you don't have that- mix 1/2 tsp cinnamon, 1/4 tsp ginger, 1/8 tsp allspice or cloves and 1/8 tsp nutmeg and then use HALF  of that in these muffins)
optional: extra chocolate chips

Prehat your oven to 400. Line your muffin tins with papers or spray them with veg oil spray.

Place the muffin mix in a large bowl and take a whisk to it a couple of turns. Sometimes there are large clumps in boxed mixes and I find this step helps with incorporating all the ingredients later.

Make a well in the dry mix and add the rest of the ingredients. Mix until combined- about 20 strokes. Don't go all crazy on your batter, you want it just mixed and you don't want to beat the heck out of it!

Using a measuring cup or a handy dandy ice cream scoop (my favorite tool!), fill your muffin cups three quarters of the way full. Add a few more chocolate chips on top of each- everyone loves a little extra chocolate on top, right?

Pop them in the oven and bake about 18-21 minutes or until a toothpick comes out clean. If it has chocolate on it, get another and test another spot!

Cool on wire racks and then eat them up or place in a ziplock bag in the freezer. Thaw overnight in the fridge or pop your frozen muffin in the toaster oven to thaw!

MUFFIN TIP--- the last time I made these I got 14 muffins instead of 12. Do you know the trick to baking those 2 little extra muffins in that BIG 'OL 12 cup muffin tin? Just add your extra liners to the pan and then scoop in your batter. Then carefully add a little water to the remaining EMPTY muffin cups. This will prevent burning and allow for even cooking of the muffins throughout!

Saturday, October 23, 2010

Sweet little Candy Coated Apples ~ 10.23.10


A few weeks back our MOPS group made these cutest ever bite size candy coated apples- one for each member of our family!

We melon balled our granny smith apples and then stuck a pick in them (you could also use a lollipop stick).
We had our peanut butter chips and butterscotch chips already melted and ready to go. Swirled our little apples on a stick around in the melted chips and then dipped them in the toppings of our choice! I thought it was a wee bit easier to shake the toppings over the dipped apples- less of the coating came off in the toppings that way. Place them in a mini-foil cup to dry and there you have the cutest little fall treat you ever laid eyes upon!

For more detailed instructions, check out this article at Family Fun

**Few notes. I just scooped ten little apples out of ONE granny smith. So, I think you could get 8-10 bite size apples per apple. Also, I dipped mine in some of that Marzetti's caramel dip b/c a) I was in a hurry and b) I wanted to see how it would hold up. Enjoy!

UPDATE: the caramel in the little tub will not set up, so be forewarned. It also tastes kinda funny. Live and learn.

Friday, October 22, 2010

Halloween Fun Food ~ 10.22.10


Here are a few recipes that are simple enough for the kids to make/help you out with next week!


Crescent Roll Mummies

package of crescent rolls - you'll make 8, so use more if you have more to feed
package of hot dogs
mustard and ketchup

Unroll crescent rolls and separate to form 4 rectangles- pinch together the perforations (You could also buy the new recipe creations crescent dough and work from there).
Using your kitchen shears, cut each rectangle lengthwise into 10 strips
Wrap 4 pieces of dough around each hot dog (you may use less)- you'll stretch the dough as you work around the hot dog. You could tuck a piece of cheese behind the hot dog before you wrap it up- but I opted out of that.
Separate the dough just a bit so that you can "make a face" after it's cooked.
Bake at 375 on an ungreased cookie sheet for 13-16 minutes- until golden brown. Make a face on your mummy dog with the mustard!


Mummy Pizzas

english muffins
pizza sauce
string cheese or shredded mozzarella
toppings- olives for eyeballs!

toast your english muffins under the broiler for a few minutes
top with some sauce and lay the cheese in a "mummy-esque" fashion across the muffin
place 2 olives on for eyes.
Remind the kids they can take the olives off and feed them to Daddy if they don't like them
Bake in the oven about 10 minutes or until warmed through.
Serve with "green fries" (aka green beans) and ketchup


Halloween marshmallows floating in a cup of hot cocoa! Mmmmm.... They were bats and ghosts but they melted a wee bit before I could take their photo!

Still to come... those bite size caramel apples... so adorable you'll cry!

Thursday, October 21, 2010

Savory Sweet Potato Soup + Smoked Apple Panini~ 10.21.10

Oh how I love this season and all the comforting soups that accompany it.

One of my favorites that I discovered last year is the Farm Chick's Savory Sweet Potato Soup. It is so incredibly easy to make and I've been eating it up ALL week.

What goes better with soup than a hot, pressed sandwich (aka PANINI)? We have a wonderful little deli near our home and they serve up a hot sandwich every day of the week. A few of my favorites are the Cuban and the Monte Cristo. A little variation on your traditional grilled cheese... these sandwiches have FLAIR and really FUN FLAVORS!
Today's advertised sandwich was the Smoked Apple Panini and they were starting to serve it at 11. Well, I was there at 10:15 and I wanted that sandwich. SO, I saved myself a couple bucks and bought up some deli meat and a loaf of bread and made it AT HOME. The flavors were so beautiful together. Black Forest Ham, Smoked Gouda and... APPLE BUTTER! Who knew putting apple butter on your sandwich could elevate that simple pairing of meat, cheese and bread to the level of PURE BLISS? Well, I am a fan and hope to eat that one again... and again... and again. AND did you know that you do not need a fancy schmancy panini press to make these? I don't have one. I used my tea kettle and a piece of foil to press my sandwich! Improvise!!

Here are the recipes!

Savory Sweet Potato Soup
makes 2 quarts

The original has a few extra steps and uses heavy cream, but I have adapted it a bit and find that it is just as creamy and delicious my way.

1/2 stick butter
2-3 onions, chopped
6 cups chicken broth
1 1/2 lbs sweet potatoes, peeled & cubed (small enough to fit on your spoon)
1 1/2 lbs russet potatoes, peeled & cubed
2 tsp ground cumin
1-2 tsp dried parsley
salt and pepper to taste

1. Melt butter in large pot and add onions. Sauted until softened & translucent- about 5 minutes.
2. Add the broth and sweet potatoes. Bring to a boil. Cook 10 minutes.
3. Add the russett potatoes. Cook for another 10 minutes- you want them tender. (sometimes I scoop out the sweets and add them back in after the russetts have cooked. Not quite sure why you don't add them ALL at the same time...)
4. At this point, I add the seasonings- cumin, parsely and S&P. Then I scoop out some of the potatoes and puree the rest. I don't like it ALL pureed. I like some potatoes in my soup. You could just leave it as is- no pureeing OR do as I do and puree some and leave some potatoes whole OR puree the whole pot of soup. Make it yours.
5. Cook over low heat until warmed through. Serve.

Here's a link to the original with a few extra recipes included.

Smoked Apple Panini
(instructions for one panini)

Couple slices Black Forest Ham
Slice or two of Smoked Gouda cheese
2 slices bread of your choice
butter
Apple (or in my case, Pear) Butter

Slather the outside of both slices of bread with butter and preheat your griddle.
Place one piece of bread, butter side down on griddle.
Lay your slice of gouda on that piece - I halve my cheese to make it fit the bread I had.
Lay your ham on top of the cheese.
Spread the inside of your other piece of bread with the apple/pear butter. Lay that on top of the ham, with the apple butter side touching the HAM.

Place a piece of foil over your sandwich and top it with something heavy.... like a filled tea kettle!
Cook for a few minutes and check to see how toasty the first side of bread is getting. If ready to flip... then flip and repeat.

Serve hot with a nice bowl of soup!

ps. Come back soon, b/c I have the CUTEST mini caramel apples to show you! You're gonna cry when you see how cute they are!!!!