Showing posts with label kid faves. Show all posts

Wednesday, February 12, 2014

Bok Choy Salad


What seems like many moons ago, I was busy with a fabulous MOPS group here in Pittsburgh. MOPS was such a blessing to our family right after I had the twins. I discovered how wonderful it was to have an army of moms bringing meals and helping us through those first insanely crazy months of having newborn twins!

One of the treasures of MOPS is the food. I know, I know- it's not about that but really, I loved coming together with other moms and learning recipes from them and trying new foods (we ate at every meeting!). Maybe not all MOPS groups are like that but ours was very much food oriented.

So here's a recipe from a cookbook that some of the moms compiled.
It has absolute NO BOK CHOY in it but regardless, my kids love this salad and for me…. that makes it a hands down winner.

They don't like cole slaw a whole bunch but this is a cousin to it. We had this salad the other night with PWs spicy pulled pork. They gobbled them both up!


Bok Choy Salad

Salad ingredients:
1 head Romaine Lettuce- if you have a three pack, I used one and a half
2 green onions- sliced
Broccoli Slaw- I used a couple handfuls, not the whole bag
1 package ramen noodles - half of it (you won't need the flavor packet)
1/2 cup or so of sliced red pepper
1/2 cup cashews
1/3 cup sliced almonds

Dressing ingredients:
3/4 c light olive oil- I used half canola and half olive oil
1/3 c apple cider vinegar
2-4 dashes sesame oil
1/2 c sugar
1 tsp salt and pepper, each

Combine dressing ingredients in a jar, shake to combine.
In a bowl, combine first four salad ingredients. Top with cashews, almonds and ramen noodles. Toss gently. Add dressing and toss again. Taste to see if it needs a little more S or P.

You'll have half a jar of dressing left to make this once more! (and you should have plenty of the above ingredients for another salad)

Thursday, April 11, 2013

Pastry Wrapped Sausages with Maple Dijon Dipping Sauce


Funny story. Have you ever seen a recipe and visually cataloged it in your brain... maybe even added the ingredients to your shopping list and then bought them only to find that you cannot, for the life of you, remember where you saw/read that recipe?

That happened to me a month ago. Searched my internet history, Pinterest boards, ziplist file, recent magazines I had read and still... couldn't find this recipe. Then I googled it. And I found similar recipes but not THE one... the one that was in my head and I could literally see a picture of how these things were made, in my mind.

And a few weeks ago I finally happened upon it in a new cookbook I received for Christmas, Savoring the Seasons with Our Best Bites! I couldn't believe when I saw the little inset picture on the corner of page 8. It was exactly what I had imprinted in my mind.

To be completely honest, I know I could have recreated this recipe but I really just wanted to FIND where I saw it!

So I picked up the rest of the ingredients at the store today set on making these as an after-school snack for the boys. I knew they'd love them. And they did. I made enough for two batches. One for today and another in the freezer for another day! So my recipe below is doubled. You do all the work once and get to enjoy them twice!

While the little sausage bites are great, the addition of the dipping sauce is really good. I recommend you go for it.

Pastry Wrapped Sausages with Maple Dijon Dipping Sauce
adapted from Savoring the Season with Our Best Bites, pg 8


1 box frozen puff pastry, thawed according to package
2 pkgs breakfast sausages- about 14 links; 12 oz each
1/2 cup shredded cheese- I used sharp cheddar
little maple syrup
1 egg, beaten, for egg wash

Maple-Dijon Dipping Sauce

2 Tbs Dijon mustard
4 Tbs maple syrup
4 Tbs mayonnaise

whisk until combined, refrigerate until ready to serve.
*incidentally, I think I did a 2, 2, 2 ratio on the sauce and it was still really good. So go ahead and use a little less maple syrup and mayo. Remember too how much you are making... I served about half of my sausages and froze the rest.

For the Sausages:


Unfold the puff pastry onto a silpat or lightly floured surface.  Sprinkle the top lightly with flour and roll out to about 12x12 square. Mine was not quite square as you see. Use a knife to cut into 3 equal portions. Brush one side with a little maple syrup (real maple syrup, okay I guess you could use pancake syrup but why?)


Place about 3 sausages down one side (lengthwise)  of the puff pastry, in each section. If you have a little extra dough, cut a sausage to fit. Sprinkle cheese right beside the sausage, just a little. You can skip the cheese if you'd like. These are quite adaptable. Now starting from the edge where the sausages are, roll them up until the pastry is all around them. Pinch the seam to seal.
(forgot to take a picture of this most important of the recipe. mea culpa)

Cut sausages up using a serrated knife (it worked best for me, but then I felt like the kitchen shears did an equally impressive job getting through the sausage casings). I got about 3 bites per sausage or.... this many... which is more, I know, but I wanted them to be snack size.

Repeat these steps until you've used all your pastry dough.


Place on a parchment lined baking sheet and brush with egg wash. 
OR
Take this un-egg washed batch and flash freeze it while you continue making your wrapped sausages. I did this with half of them and they're ready to be popped in the oven for the next snack time or game day or get together!


Bake at 375-400 (they forgot to mention the oven setting in their cookbook!) for 15-20 minutes. You want them to look like this:


Serve alongside the dipping sauce and enjoy!

They have the thumbs up from our crew! The Big People in the house really loved them as well! Did I mention the sauce was fabulous? It was!

Tuesday, March 22, 2011

Super Sloppy Joe's ~ 3.22.11

You'd think that everyone loves sloppy Joe's, huh? Not in this family. So, I don't make them all that often. But when I asked G what special dinner he'd like me to make on the day he received his first reconciliation and it just so happened to be the feast of St. Joseph, he said, "Sloppy Joe's"!
Funny thing is, when we get to the table, the kids were all over the place about eating them or even trying them. Ah, children. This is not the first time I've made these and depending on the day, somewhere between 1 and 4 of the kids will eat it all with no complaints!

Regardless, this is a great kid favorite and the grown ups in our house love it, too. I think using half ground turkey (93/7) and half ground chuck works best for us. I also sub out green pepper for red in my recipe. I love the color it adds and I just don't like green peppers all that much. Now, when it comes to that laundry list of seasonings, don't fret, if you don't have steak sauce, don't use it! But add that pinch of cloves, it's just a unique underlying flavor that makes you go hmmm.... Lastly, know that these are a bit more sweet than spicy. So, cut back on the ketchup if you don't like it so sweet or add some Frank's or whatever to add a little spice. The original recipe had brown sugar in it and I just omit that all together.

Super Sloppy Joe's

adapted from Taste of Home

2 lbs ground beef
1/2 cup chopped onion
2 celery ribs, minced fine
1/4 cup chopped red pepper
1 15 oz can tomato sauce
1/4 cup ketchup
1 Tbs vinegar
1 Tbs worchestershire sauce
1 Tbs Heinz steak sauce
1/2 tsp garlic salt
1/4 tsp ground mustard
pinch gr cloves

hamburger buns

1. Over medium heat, cook beef, onion, celery and red pepper until meat is no longer pink and veggies are tender. Drain off fat.
2. Add rest of the ingredients. Simmer uncovered, 25 minutes, stir occasionally.
3. Spoon onto buns.

4. Serve leftovers like this:
Sloppy Joe Pasta!

Friday, December 17, 2010

Cheesy Noodle Casserole (aka Mac n Cheese) ~ 12.17.10


My family loves macaroni and cheese. The twins ask for it about 5 out of the 7 days in a week. And whenever we're out... they want to order it!
I'm all for quick and simple this time of year. I've barely enough time to rub two cents together let alone make dinner, but make dinner, I must! And I will.

I've had this Taste of Home recipe for sometime now and first made it way back when for a birthday party. It was easy to make and really quite cheesy and yummy. That said, it has one of my least favorite food stuffs in it: processed cheese. sigh. But it does taste really good in this and occasionally, I'll heat it up and add some salsa and make Mr. Crafty our favorite treat: queso with chips.

This recipe is flexible in the noodles you use, too. The original called for wide egg noodles, but I made it on Sunday and used elbows. Remember, use what you have! You don't always have to go and buy a new ingredient if you have something similiar in your pantry already.
Also, this makes enough for a BIG crowd, so adjust by halving the recipe and you'll have plenty. I used 8oz of elbows when I made it and wished I had used the whole box! My adaptations are in parenthesis.

Cheesy Noodle Casserole
adapted from Taste of Home Oct/Nov. 2003

2 1# pkgs wide egg noodles (elbows or shells are great!)
1/2 cup butter
1/4 cup all purpose flour
1 tsp garlic salt
1tsp onion salt
1/2 tsp dry mustard
5-6 cup milk (I used a can of evaporation milk and the rest 2% milk)
2 # processed cheese, cubed (like Velveeta or store brand easy melt cheese in the block)

Topping: 1/2 cup dry bread crumbs + 2 Tbs melted butter- mix together and sprinkle on top
or halve grape tomatoes and arrange around the casserole- my personal fave!

Cook noodles to package directions, drain.
In dutch oven (read: large pot with handles or whatever), melt butter.
Stir (whisk is better- it forms a bit of a paste or roux) in flour and salts and dry mustard
Gradually whisk in the milk until all incorporated.
Bring to a boil.
Cook & stir 2 min or until thick and bubbly.
Add cheese and stir until melted.
Stir in noodles and pour into 2 greased shallow 2 qt baking dishes
Add your topping of choice: bread crumbs mixed with butter or sliced tomatoes!
Bake uncovered at 350 degrees for 25-30 minutes or until golden and bubbling around the edges.

Friday, October 22, 2010

Halloween Fun Food ~ 10.22.10


Here are a few recipes that are simple enough for the kids to make/help you out with next week!


Crescent Roll Mummies

package of crescent rolls - you'll make 8, so use more if you have more to feed
package of hot dogs
mustard and ketchup

Unroll crescent rolls and separate to form 4 rectangles- pinch together the perforations (You could also buy the new recipe creations crescent dough and work from there).
Using your kitchen shears, cut each rectangle lengthwise into 10 strips
Wrap 4 pieces of dough around each hot dog (you may use less)- you'll stretch the dough as you work around the hot dog. You could tuck a piece of cheese behind the hot dog before you wrap it up- but I opted out of that.
Separate the dough just a bit so that you can "make a face" after it's cooked.
Bake at 375 on an ungreased cookie sheet for 13-16 minutes- until golden brown. Make a face on your mummy dog with the mustard!


Mummy Pizzas

english muffins
pizza sauce
string cheese or shredded mozzarella
toppings- olives for eyeballs!

toast your english muffins under the broiler for a few minutes
top with some sauce and lay the cheese in a "mummy-esque" fashion across the muffin
place 2 olives on for eyes.
Remind the kids they can take the olives off and feed them to Daddy if they don't like them
Bake in the oven about 10 minutes or until warmed through.
Serve with "green fries" (aka green beans) and ketchup


Halloween marshmallows floating in a cup of hot cocoa! Mmmmm.... They were bats and ghosts but they melted a wee bit before I could take their photo!

Still to come... those bite size caramel apples... so adorable you'll cry!

Monday, November 9, 2009

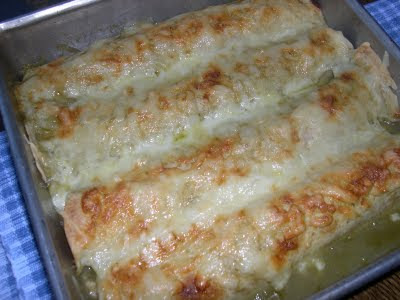
Honey Lime Chicken Enchiladas ~ 11.9.09


(Enchiladas just do not photograph well... I tried this in a few different places and this will have to suffice.)

This recipe was posted over at The Sister's Cafe and I've made it twice now. The kids wouldn't touch it the first time and the second time... they gobbled it UP! Love the sweet and spicy combination of these and that they do not contain any condensed soups. So many enchilada recipes are just heavy and laden with those soups (sorry if you like that type). These are more my style. I added cilantro to my chicken mixture  because it just works well with all the flavors and because I had some in the fridge that I needed to use up.

Honey Lime Enchiladas
via The Sisters Cafe with my creative license added

about 2 cups of cooked chicken - pulled/shredded (or pork)

Marinade:
Mix together:
1/3 cup honey
1/4 cup lime juice
1 Tbs chili powder ( may need to use less for my weaklings next time)
1 tsp garlic powder

2 cans green enchilada sauce or 1 can and some green salsa (it worked and I had some salsa to use up)
1/2 cup heavy cream 

shredded monterey jack- some for inside and lots of ON TOP!
(the Sisters use a combo of mozzarella and cheddar)

flour tortillas - I like the wheat ones

Directions:
Mix together your sauce ingredients and add them to the chicken (or pork). Let marinate for about 30 minutes. I've let mine sit overnight.

Lightly spray a 9x13 pan with cooking spray. Pour in some enchilada sauce- just enough to coat the bottom of the pan.
Fill the tortillas with an ice cream scoop of filling and cheese (oh, I mixed in the cheese with my marinated chicken mixture right before I filled the tortillas). Roll them up and line them up in your pan. I had to squeeze one along the side, but I believe I wedged 10-12 of them in there. You can always carry over to another pan if you need to do so.

Mix remainder of the green enchilada sauce with 1/2 cup whipping cream. Pour over the enchiladas and top, generously, with more cheese! I also sprinkled some chopped cilantro on top.
Bake uncovered at 350 for 30 minutes. Turn on the broiler and let the cheese get all brown and crispy on top- just a few minutes should do the trick!

Serve with a side of Lime Cilantro Rice with pineapple!

another not so photogenic shot of these delicious little treats!

Sunday, October 25, 2009

Frightening Food! ~ 10.25.09

It's really hard for me to fathom that October is nearly over- which means Halloween is nearly here! EEKS!

I think we have all our costumes.... but Commander Fox and Chewbacca may need a little tweaking. In fact we will, as I'm typing this I'm awaiting the lady on craigslist to tell me if a Darth Vader costume is available. The seven year old has changed his mind... again. lovely.

But these precious little mummy dogs make me smile. Here's how you can make them- visit here!


Last year, we made mummy pizzas. English Muffins with sauce and mozzarella cheese. My kids do not like olives, but my husband does, so it was okay to open a jar just for decorational purposes. I've been using this simple pizza sauce recipe lately and really love it! So EASY to make!


When you serve your kids food like this... they may just make super scary faces at you while you take their picture.... oooooo..... very scary!


So this is usually what they eat for Halloween... simple food that is fast and KID-Friendly.

To find out what I will be eating for All Hallow's Eve... you'll need to check back later this week!

Monday, October 12, 2009

Review: Walking Tacos ~ 10.12.09

Today's meal is brought to you by Corona and Doritos.

Kidding. But they go great together and are somehow involved in this meal I'm about to share.
I was reminded it of it last weekend while I was at Applefest up in Franklin, Pa. Tons and tons of food vendors and I saw a sign for walking tacos! You're going to love this recipe. I discovered it over at Mennonite Girls can Cook and/or Bless Us O Lord- maybe both.


A walking taco (they're a.k.a. campfire tacos) is: all your essential taco ingredients contained in a very convenient little bag of doritos! Brilliant!

I love them that way b/c :
a) my kids can eat them without tears (they get SOOOO very frustrated when their taco shell breaks and all the stuff pours out of them) and
b) they're so darn fun!

You can make whatever taco meat recipe your little heart pleases, I prefer the America's Test Kitchen one which I'll post down below. You get all your taco ingredients together in little bowls and you buy a bunch of little bags of doritos (Target has them and Walmart, too)- you can buy JUST snack size doritos, as I discovered when I went to make these the first time around.

Here we have taco meat, shredded lettuce, taco sauce, tomatoes, avocados, monterey jack cheese and queso.

Open up your dorito bag and fold the top over just a little. Scoop in your taco fillings, mix it up and bit and eat it with a fork or spoon. Grown ups, add corona with lime. YUM!

If you have leftovers, you can scoop all the ingredients onto broken up pieces of taco shells or tortilla chips.... fun and yummy snack! Little open-faced tacos. Taco bruschetta. Whatever, it's good.

My favorite taco meat recipe:
Beef Tacos - serves 4; (can double, but you'll want to cook the meat in batches)
2 tsp veg oil
1 small onion, chopped small
3 medium garlic cloves, minced or pressed
2 Tbs chili powder
1 tsp gr cumin
1 tsp gr coriander (I don't have this)
1/2 tsp dried oregano
1/4 tsp cayenne pepper
salt
1 pound 90% lean ground beef
1/2 cup tomato sauce
1/2 cup low-sodium chicken broth
1 tsp brown sugar
2 tsps vinegar, preferrably cider vinegar
black pepper
  • Heat oil to medium and saute onion until softened, about 4 minutes.
  • Add the garlic and spices and 1/2 tsp salt; cook, stirring constantly, until fragrant, about 1 minute
  • Add ground beef and cook, breaking up with spoon and scraping the bottom of the pan to prevent scorching, until the beef is no longer pink, about 5 minutes.
  • Add the tomato sauce, broth, brown sugar and vinegar; bring to a simmer.
  • Reduce heat to med-low and simmer uncovered, stirring frequently and breaking the meat up so that no chunks remain, until the liquid has reduced and thickened (the mixture should not be completely dry), about 1o minutes.
  • Adjust the seasonings with salt and pepper to taste.


Thursday, October 1, 2009

Cranberry Jello Salad- a family fave


My Godmother, Deanna, made this recipe for years and its been a longstanding family tradition to have it at the Thanksgiving and Christmas tables. My kids love it and I've taken to making it throughout the year for picnics or as a fun side dish alongside pork or chicken. In fact, I'm so fond of making it that I always have the ingredients for this on hand for when I need a quick side dish- I keep them all together on the pantry shelf so that I know if I'm missing one of them or need to restock on whole cranberry sauce! Good tip.


I often leave out the walnuts when I bring it to a large group event as I'm fearful of nut allergies- so know that it tastes just as good without them as it does with them included.


Cranberry Jello Salad

1 large cherry jello (big package- or two small)
1 can Ocean Spray whole cranberry sauce
1 can crushed pineapple, drained, but not all the way
1 can mandarin oranges, drained
1/2- 1 cup walnut pieces

Boil 1/2 cup of water; Dissolve jello with water in large bowl.

Add the rest of the ingredients and mix well.

Let sit overnight in fridge.


As I was typing this up, I noticed I taped an alternate version of this recipe to the back of my recipe card. I'm thinking I cut it out of a magazine or the coupon section of the paper. I'll post that here as it does sound interesting and the kids might really enjoy it! Let me know if you try it.

Monday, September 21, 2009

Chicken Crescents and bonus dessert! ~9.23.09

I might be exaggerating to say that my life changed quite a bit when I discovered this recipe, but not by much. The entire Costain crew loves these Chicken Crescents and that makes for a very happy momma. They don't even pick out the "red things" anymore! I know that crescent rolls might not be the healthiest of foods, but they are, in fact, the coolest food invention in my book and I depend on them for quick meals/appetizers/desserts often.

The original recipe can be found in the Three Rivers Cookbook III (known in our family as the "blue one") on pg 111.

Ingredients:

  • 1 can crescent rolls
  • 3 oz cream cheese, softened
  • 2 Tbsp butter, melted
  • 2 cups chicken, cooked and cubed/shredded (whatever you want)
  • 1 Tbsp chopped pimento- I do not stress if I don't have this in the house, optional
  • 1/2 red pepper, diced and sauteed
  • 1/2 pound mushrooms, diced and sauteed
  • 3-4 green onions, chopped and sauteed
  • S & P
  • 2 Tbsp milk
  • 1/2 Tbsp chopped parsley

After I preheat the oven to 350 degrees, I start by putting the cream cheese and butter in a bowl and popping them in the microwave a few secs to soften. I mush them together with a fork with the chopped parsley.

Then I saute up the peppers, green onions and mushrooms. I season them with Salt and Pepper, to taste, at this junction, too. The amounts for this vary in my house depending on what I have. The original recipe calls for green pepper (only 1 Tbsp sauteed) and only 2 Tbsp chopped sauteed mushrooms. I use A LOT more than that, prefer red peppers and these are still stellar and filling! Don't they look delish all sauteed up...


And the star of this dinner... most versatile food invention evah... CRESCENT ROLLS! AND I'm not brand specific either. I prefer pillsbury, but I've bought store brand, "wally world" brand and others. Whatever floats your pocketbook's boat, in my opinion. If you are using these, don't forget to snip off the box tops and send them to a school you love!
You'll need to keep these in rectangles. So open the package and put them on a greased or silpat lined baking sheet. Smoosh the perforated edges together to form 4 rectangles.
Now, let's get the filling ready to go...

So, after you sautee the veggies, let them cool for a few in the pan or in a bowl. Then if you need to cut up your chicken, do that now. I almost always use leftover rotisserie chicken for this. However I have poached chicken to use specifically for this recipe and if I do this, I do double and freeze the other half for a day when I need cooked chicken in a recipe. (do you know how to poach chicken? I'll teach you if you'd like... Sarah Moulton taught me, she used to be on Food Network, I've learned a lot from that channel).

Okay, chicken's ready, put it in the bowl with the cream cheese, butter and parsley.
Add your sauteed veggies and the 2 Tbsp of milk. The milk helps it all to go together nice and smooth. It should be creamy looking- you're ready to fill those crescents.
Spoon about a 1/2 cup of the mixture on each crescent (if you have more, save it or open up another can of crescents- I can tell you what to do with "leftover crescents" later).
If only I took pics of this next part- you bring the four corners of the crescent roll together in the middle and twist... can you envision that? I hope so. It will look like a little purse, of sorts.

Bake at 350 for 20-30 minutes. You'll want them to look like this... all golden and delicious!

BONUS DESSERT:
If for some reason you have leftover crescent rolls b/c you have more than enough filling... consider yourself lucky!


Grab some chocolate chips or cinnamon chips or butterscotch chips or nutella-- something sweet that melts. And put a little bit in the large end of a crescent triangle. You want to roll it up in a crescent roll shape and make sure that the chips are hidden inside... they may oooze out while baking. Bake for about 9-13 minutes and you'll have chocolate crescents (or whatever flavor you put inside there). Nutella rocks, by the way.

Serve with rice and a salad! Buon Apetito!


Saturday, July 11, 2009

Cool, crisp Cucumber salad ~ 7.11.09


My entire family of 6 loves this salad (THANK YOU, GOD) and I can't say that about many recipes or foods!
So I make it all summer and whenever I find some nice looking cucumbers. These were English Cucumbers [English cucumbers can grow as long as 2 feet (0.61 m). They are nearly seedless, have a delicate skin which is pleasant to eat, and are sometimes marketed as “Burpless”, because the seeds and skin of other varieties of cucumbers can give some people gas - via wikipedia]- which explains why they're roundish and still have the skin on them. If they weren't I'd have had to peel, cut the cuc in half and scrape out the seeds with a spoon.

Now you're ready for this super-duper easy and delish recipe:

1-2 English cucumbers- if not English ones, do what I described above
1 Tbs kosher salt
1 tsp sugar
4-5 Tbs white wine vinegar
fresh or dry dillweed (if using dry, I just shake it on until the cucs are evenly coated)

Slice your cucumbers very thin. Toss with salt and sugar and dillweed. Add vinegar. Put in fridge and let the flavors marry together. Eat 'em up!

I believe I first got this recipe years ago from Martha. This is the closest link I could find to the recipe, online.

Monday, April 27, 2009

Take the plunge & have a slice of breakfast pizza ~ 4.27.09


I've been inspired.

I've been thinking about taking the plunge lately and well, I'm just going to dive in.

I'm sick of it being 4:30 and me wondering, what exactly can I throw together for these 4 kids and myself? (I usually know what's for dinner on the nights when Mr. Crafty is going to be home) I'm tired of running to the grocery store with 2-4 kids (depending on the day and time) b/c I don't have cilantro or milk or food.


Leila is inspiring me to get those meals thought out, planned and money will be saved!

Let's here it for knowing what's for dinner before dinner! WOO HOO!

Let's here it for saving money! WOO HOO!!!

Let's here it for taking the time to finally plan it all out! WOO HOO!!!!!!!!!!

If there's anything that having a blog (or two) has taught me, it is this- if I put it "out there" in the world that I'm going to do something, I will do it. I have accountability. I have friends and Mr. Crafty P asking me, "have you done _____ yet?" It's a remarkable system and it's working. And I'm trusting in this practice that it will work with this as well.

So, it began when I found Leila's posts on her sidebar. You can start HERE and then check out her sidebar for worksheets and more posts to inspire YOU!

Who wants to join me? I love a party and this seems like a good party to get into on a weekly basis, no?

Wondering what the picture up above is? Those are the infamous Bananaroni Pizzas. I saw a picture of them in a parenting magazine, I believe it was a freezer waffle ad and thought - awesome idea!

Make your frozen waffles. Spread with butter, then your favorite jam/jelly. Top with sliced bananas, maybe sprinkle on some wheat germ (ooo! good idea! just thought of that!) and cut with a pizza slicer.

A fun way to mix up eating waffles the same way all the time!

p.s. I've begun this process in varying stages for awhile now, but I'm ready to embrace it fully! Let's GO!